
Casio G-Shock watches are renowned for their toughness‚ innovative features‚ and reliability‚ making them a favorite among outdoor enthusiasts and urban users alike.
This guide provides a comprehensive overview to help you master your G-Shock‚ from basic setup to advanced functions‚ ensuring optimal performance and longevity of your timepiece;
1.1 Overview of G-Shock Features
G-Shock watches are built with unmatched toughness‚ featuring shock resistance‚ water resistance‚ and advanced functionality; They include multiple modes like timekeeping‚ world time‚ alarms‚ and timers. Solar charging and power-saving modes ensure longevity‚ while LED illumination enhances visibility. These features combine practicality with durability‚ making G-Shock ideal for both everyday use and extreme adventures.
1.2 Importance of Understanding the Manual
Understanding your G-Shock manual is crucial for unlocking its full potential. It guides you through setting up features‚ troubleshooting common issues‚ and maintaining your watch. The manual provides detailed instructions for customizing settings‚ using advanced functions‚ and ensuring proper care. By following the manual‚ you can optimize performance‚ avoid damage‚ and enjoy a seamless user experience tailored to your needs.
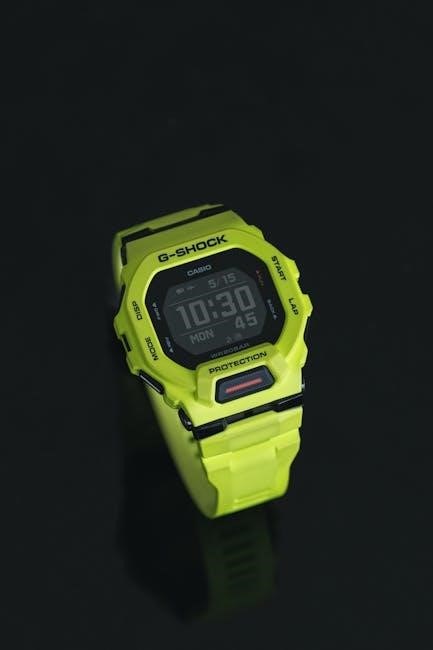
Basic Components of a G-Shock Watch
G-Shock watches feature a digital display‚ multiple functional buttons‚ and a durable design. Key components include the Mode‚ Adjust‚ Start‚ and Light buttons‚ enabling easy navigation and operation.
2.1 Identifying Buttons and Displays
Your G-Shock watch features a digital display and four main buttons: Mode‚ Adjust‚ Start‚ and Light. The display shows time‚ date‚ and mode indicators‚ while the buttons control navigation and settings.
- Mode Button: Switches between modes like Timekeeping‚ Alarm‚ and Stopwatch.
- Adjust Button: Accesses settings for time‚ date‚ and configuration.
- Start Button: Activates the chronograph or selects options.
- Light Button: Illuminates the display for better visibility.
2.2 Understanding the Mode Indicator
The mode indicator on your G-Shock watch displays the current function‚ ensuring easy navigation. It shows icons like a clock for Timekeeping‚ a globe for World Time‚ or a stopwatch for Chronograph mode.
Located at the top of the digital display‚ it helps you confirm the active mode‚ making it easier to switch between functions efficiently without confusion.

Setting the Time and Date
Press the Adjust button to view the Home City. Hold it to change settings. Adjust the time and date accurately for proper functionality.
3.1 Adjusting the Home City
To adjust the Home City on your G-Shock watch‚ press the Adjust button until the city code flashes. Use the D button to cycle through available cities. Hold the button to set your selection. The display will confirm the update. This ensures accurate timekeeping based on your location. Follow on-screen prompts for additional settings if needed.
3.2 Synchronizing Time
Press and hold the Adjust button until “H-SET” appears on the display. Use the D button to select your home city. Ensure the watch is in an area with strong signal strength. Once synchronized‚ the display will confirm the update. This feature ensures your G-Shock maintains precise time accuracy. The watch will automatically adjust for daylight saving time based on your selected city.
Navigating Modes
Press the D button to cycle through modes. Hold it for over one second to return to Timekeeping Mode. This ensures smooth navigation between functions.
4.1 Switching Between Modes
Press the D button to cycle through modes. Each press switches to a different mode‚ such as Alarm‚ Timer‚ or Stopwatch. The display will indicate the current mode. To return to Timekeeping Mode‚ hold the D button for over one second. This allows seamless navigation between functions without losing track of the current mode.
4.2 Selecting Timekeeping Mode
To return to Timekeeping Mode‚ hold the D button for over one second. The display will show the current time and confirm the mode change. Pressing the D button once will cycle through other modes like Alarm or Timer. Use this feature to quickly access Timekeeping Mode whenever needed. Always verify the mode indicator to ensure proper function.
Using Alarms and Timers
Set alarms and use the chronograph to track events. Press buttons to cycle through alarm settings or start/stop the timer for precise time management.

5.1 Setting Alarms
To set an alarm on your G-Shock watch‚ navigate to the Alarm Mode by pressing the appropriate button until “ALARM” appears on the display. Use the lower right button to adjust the alarm time and the upper right button to decrement. Press the “Adjust” button to toggle between hours and minutes. Once set‚ press the lower left button to enable the alarm. Ensure the alarm is turned on and adjust settings as needed for optimal use.
5.2 Using the Chronograph
To use the chronograph on your G-Shock watch‚ press the button to navigate to the Stopwatch Mode until “CHRONO” appears. Press the lower right button to start timing. Press it again to stop. Use the lower left button to reset. The display shows minutes‚ seconds‚ and hundredths of a second. This feature is ideal for precise event timing‚ and some models include lap memory and energy-saving modes for extended use.

Power Management
G-Shock watches feature solar charging and power-saving modes to extend battery life. Ensure optimal energy use by adjusting settings and enabling low-power alerts for efficient performance.
6.1 Understanding Solar Charging
G-Shock watches with solar charging harness light energy to power their functions‚ reducing the need for battery replacements. Exposure to direct sunlight or bright indoor light replenishes the battery efficiently.
Ensure the watch face is not obstructed and avoid prolonged storage in darkness. Regular charging maintains optimal performance and extends the lifespan of your G-Shock timepiece.
6.2 Activating Power Saving Mode
To activate Power Saving Mode‚ press and hold the D button until the H-SET and Sub indicators appear. This mode reduces battery consumption by disabling non-essential functions. The watch will automatically enter a low-power state when in darkness for an extended period. Power Saving Mode helps extend battery life‚ especially in low-light environments‚ ensuring your G-Shock remains operational for years without frequent recharging.

Customizing Settings
Customize your G-Shock’s display‚ alarms‚ and world time settings for a personalized experience‚ ensuring optimal functionality tailored to your lifestyle and preferences.
7.1 Adjusting Display Settings
Adjusting the display settings on your G-Shock watch allows you to personalize its appearance and functionality. To modify the display‚ press and hold the Adjust button until the settings menu appears. Use the D button to toggle between options like 12/24-hour format or date display. You can also adjust brightness and illumination settings for better visibility in low-light conditions. Save your preferences by holding the Adjust button again to exit the menu.
7.2 Configuring World Time
To configure World Time on your G-Shock watch‚ press and hold the Adjust button until the settings menu appears. Use the D button to scroll through available city codes‚ which represent different time zones. Once you select a city‚ the watch will automatically synchronize the time for that zone. This feature is ideal for travelers‚ ensuring accurate timekeeping across multiple regions. Save your selection by pressing the Adjust button again.

Advanced Features
G-Shock watches offer advanced features like illumination‚ menu navigation‚ and smart connectivity‚ enhancing functionality for users seeking more than basic timekeeping‚ while maintaining their signature durability.
8.1 Using Illumination
Press the illumination button to activate the backlight‚ ensuring visibility in low-light conditions. Some models feature auto-illumination‚ turning on when the watch tilts towards your face. This feature can be toggled on or off in settings to conserve battery life. Proper use of illumination extends your G-Shock’s functionality in various lighting environments‚ enhancing usability.
8.2 Navigating Through Menus
To navigate through menus‚ press and hold the D button to access the setting screen. Use the upper and lower buttons to scroll through options. Press D again to select a setting. Adjust values using the side buttons‚ then press D to save changes. This intuitive system allows easy customization of your G-Shock’s features‚ ensuring a seamless user experience.
Troubleshooting Common Issues
Address common issues like time inaccuracies or display malfunctions by resetting your G-Shock. Hold down the light and lower buttons for three seconds to restore default settings.
9.1 Resetting the Watch
To reset your Casio G-Shock watch‚ press and hold the “D” button along with the lower right button simultaneously for about three seconds. This will restore the watch to its default settings‚ resolving any operational issues without affecting stored data.
9.2 Resolving Display Problems
If your G-Shock watch display appears blank or distorted‚ restart it by pressing the “D” button and the lower right button simultaneously for three seconds. Ensure the watch is fully charged‚ especially for solar models. If issues persist‚ adjust the display settings or reset the watch as described in the manual. For severe problems‚ contact Casio support for professional assistance.

Maintenance and Care
Regularly clean your G-Shock watch with a soft cloth to remove dirt. Avoid exposing it to harsh chemicals or extreme temperatures. Store it in a dry place when not in use to maintain its durability and performance over time. Always use a soft‚ dry cloth for cleaning to prevent scratches.
10.1 Cleaning the Watch
To clean your G-Shock watch‚ use a soft‚ dry cloth to wipe away dirt and smudges. For stubborn marks‚ lightly dampen the cloth with water‚ but avoid harsh chemicals or abrasive materials that could damage the finish or scratch the display.
Pay special attention to the band and crevices‚ where dust often accumulates. Gently scrub the band with a mild soap solution if necessary. Rinse thoroughly and dry with a clean cloth to prevent moisture buildup and ensure optimal performance.
10.2 Replacing the Battery
Replacing the battery in your G-Shock watch requires care to ensure functionality. Turn off power-saving mode and remove the watch from your wrist. Open the back case using a screwdriver and gently lift out the old battery. Insert the new battery‚ ensuring correct polarity‚ and reassemble the case securely. Avoid touching internal components to prevent damage.
After replacement‚ synchronize the time and check all functions to confirm proper operation. If uncertain‚ consult a professional or the official manual for guidance‚ as improper installation may void the warranty or harm the watch.
This guide has provided essential insights to maximize your G-Shock watch experience‚ from setup to advanced features‚ ensuring optimal use and longevity of your timepiece.
11.1 Summary of Key Instructions
Mastering your G-Shock watch involves understanding its robust features‚ from setting the time and date to utilizing alarms and timers. Navigation between modes is seamless‚ ensuring easy access to functions like chronographs and world time. Proper use of buttons and display settings enhances user experience‚ while power management techniques‚ such as solar charging and power-saving modes‚ ensure longevity. Regular maintenance‚ like cleaning and battery care‚ is essential for optimal performance.
By following these guidelines‚ you can unlock your G-Shock’s full potential‚ making it a reliable companion for both everyday use and extreme conditions. Always refer to the manual for specific model instructions to ensure you get the most out of your watch.
11.2 Final Tips for Optimal Use
Regularly clean your G-Shock watch to maintain its appearance and functionality. Use the illumination feature wisely to conserve battery life. Explore all modes and settings to personalize your experience. Always update your watch software for the latest features and performance improvements. Lastly‚ adapt your watch settings to your lifestyle‚ ensuring it meets your daily needs and preferences.