An e-bike controller is the central component managing your electric bike’s electrical systems, ensuring efficient power flow and smooth operation. It acts as the brain, coordinating inputs from the rider and optimizing motor performance for a seamless ride experience.
1.1 What is an E-Bike Controller?
An e-bike controller is the central component of an electric bike, acting as the “brain” that manages power flow from the battery to the motor. It interprets rider inputs, such as throttle and pedal assist, and translates them into electrical signals to control speed, torque, and overall performance. The controller ensures efficient operation, safety, and coordination of all electrical systems, making it essential for a smooth and reliable riding experience.
1.2 The Role of the Controller in E-Bike Performance
The controller plays a pivotal role in optimizing e-bike performance by managing power distribution, coordinating motor and battery functions, and interpreting rider inputs. It ensures smooth acceleration, efficient energy use, and consistent speed regulation. By balancing torque, speed, and pedal assist, the controller enhances the overall riding experience, making it a critical component for both performance and safety.
Types of E-Bike Controllers
E-bike controllers come in various types, primarily differentiated by sensor technology and waveform. Hall sensor controllers offer smooth operation, while no hall sensors are cost-effective. Sine wave controllers provide a smooth ride, whereas square wave controllers are budget-friendly but less refined.
2.1 Hall Sensor vs. No Hall Sensor Controllers
Hall sensor controllers offer smooth startups and are compatible with most motors, making them a popular choice for consistent performance. No hall sensor controllers, while cost-effective, have a narrower application range and may lack stability. Hall sensors provide better motor control and efficiency, while no hall sensors are preferred for simplicity and lower cost, though they may compromise on ride quality and durability.
2.2 Sine Wave vs. Square Wave Controllers
Sine wave controllers produce a smooth, quiet motor operation with minimal vibration, ideal for high-torque applications and efficient power delivery. Square wave controllers offer a more affordable, straightforward solution, suitable for basic e-bike needs, though they may generate more noise and heat. The choice depends on your preference for ride quality, budget, and performance requirements.
Choosing the Right Controller
Selecting the right controller involves matching voltage and power ratings to your e-bike’s motor and battery. Consider your riding style and whether you prefer smooth, quiet operation or an affordable, basic setup. This ensures optimal performance, efficiency, and reliability for your electric bike.
3.1 Matching Voltage and Power Ratings
Matching voltage and power ratings is crucial for your e-bike’s performance and safety. Ensure the controller’s voltage aligns with your battery and motor specifications. A mismatch can lead to inefficiency, damage, or even failure. Always consult the user manual for compatibility guidelines. Proper matching ensures optimal power delivery, smooth operation, and longevity of your e-bike system. This step is essential for both reliability and rider satisfaction.
3.2 Determining Your Riding Needs
Determining your riding needs is essential for selecting the right controller. Consider your riding style, terrain, and preferences. For smooth rides, opt for a sine wave controller, while square wave controllers are budget-friendly and suitable for casual use. If you prioritize high performance or commuting efficiency, ensure the controller supports advanced features like power adjustment and assist levels. Always consult the user manual to align settings with your riding goals for optimal performance and satisfaction.

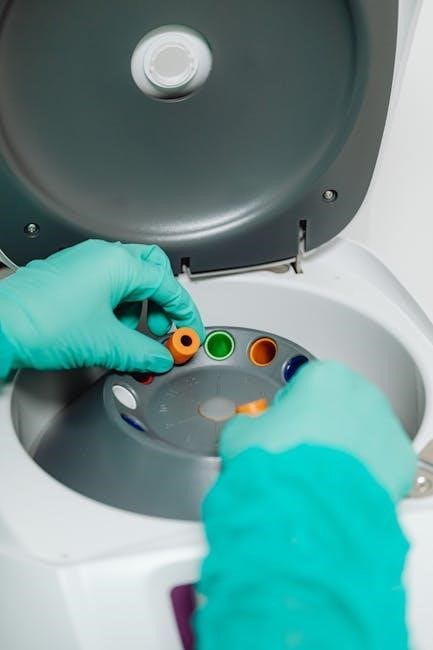
Installation and Setup
Installation involves disconnecting the battery, identifying connections, and carefully mounting the controller. Reconnect wires, ensuring proper alignment and security. Always follow the manual for precise setup.
4.1 Basic Hookup and Wiring
Connect the battery, motor, throttle, and brake wires to the controller. Ensure all wires are securely attached to prevent loose connections. Refer to the manual for specific cable assignments. Use electrical connectors to safeguard against short circuits. Double-check each connection to avoid malfunctions. Proper wiring ensures safe and efficient operation of your e-bike’s electrical system.
4.2 Step-by-Step Installation Guide
- Prepare tools and ensure the e-bike is turned off.
- Disconnect the battery to prevent accidental power-on.
- Locate and remove the old controller by detaching all wires.
- Mount the new controller securely in the same location.
- Reconnect all wires to their respective ports on the new controller.
- Reattach the battery and power on the e-bike.
- Test the system to ensure proper functionality.
- Refer to the manual for any additional configuration steps.
Parameter Settings and Configuration
Parameter settings fine-tune your e-bike’s performance, ensuring optimal efficiency and safety. Use the KT-LCD3 display to adjust settings like power levels and assist modes. Always refer to the user manual for detailed configuration guidance to achieve the best riding experience.
5.1 Using the KT-LCD3 Display for Configuration
The KT-LCD3 display is a user-friendly tool for configuring your e-bike controller. It allows you to adjust settings like power levels, pedal assist modes, and speed limits. Access the menu by pressing the settings button, and navigate through options using the up/down arrows. Adjust parameters to optimize performance and safety. Refer to the user manual for detailed instructions on configuring specific features. This display ensures precise control over your e-bike’s functionality.
5.2 Optimizing Settings for Performance
Optimizing your e-bike controller settings enhances performance and efficiency. Adjust assist levels, torque, and speed limits to suit your riding style. Fine-tune acceleration and braking sensitivity for smoother control. Experiment with configurations to balance power output and battery life. Regularly test settings on different terrains to ensure optimal performance. Refer to the user manual for guidance on advanced adjustments and troubleshooting common issues.
Maintenance and Troubleshooting
Regularly clean electrical contacts and protect the controller from water. Inspect wires and connections for damage. Troubleshoot common issues like error codes or connectivity problems by consulting the manual or manufacturer support.
6.1 Cleaning and Protecting the Controller
Clean the controller regularly using a soft, dry cloth to remove dirt and debris. Avoid harsh chemicals or water, which can damage electrical components. Ensure all connections are secure and free from corrosion. Protect the controller from moisture by storing your e-bike in a dry place. Inspect wires and seals for damage and replace them if necessary. Regular maintenance ensures optimal performance and extends the controller’s lifespan.
6.2 Common Issues and Solutions
Common issues with e-bike controllers include power cutoffs, slow acceleration, or complete system failure. Check for loose connections, damaged wires, or corrosion. Ensure the battery voltage matches the controller’s specifications. If the motor doesn’t respond, verify throttle and pedal-assist sensors are functioning. Refer to the user manual for diagnostic codes and reset procedures. Addressing these issues promptly prevents further damage and ensures reliable performance.

Understanding the User Manual
The user manual provides essential guidance for safe operation, configuration, and troubleshooting. Refer to it for detailed instructions and manufacturer support for optimal e-bike performance.
7.1 Navigating the System Controller Manual
Navigating the system controller manual is essential for understanding your e-bike’s operation. The manual provides detailed instructions on safety, configuration, and troubleshooting. Start with the table of contents to locate specific sections, such as parameter settings or error codes. Pay attention to diagrams and step-by-step guides for clarity. Manufacturer support is often available online, offering downloadable PDF versions and additional resources. Familiarize yourself with the manual to optimize your e-bike experience.
7.2 Key Features and Settings Explained
The manual details essential features like power adjustment, assist levels, and Bluetooth connectivity. It explains how to configure parameters using displays like the KT-LCD3 for optimized performance. Settings such as speed limits and torque control are covered, ensuring customization to your riding style. The manual also outlines manufacturer-specific features and provides troubleshooting guides for common issues, ensuring you maximize your e-bike’s potential with clear, step-by-step instructions.

Advanced Features and Customization
Advanced features like power adjustment and Bluetooth connectivity allow for enhanced customization. Riders can tailor assist levels and optimize settings via displays like the KT-LCD3 for personalized performance.
8.1 Power Adjustment and Assist Levels
Power adjustment and assist levels allow riders to customize their e-bike experience. By tweaking these settings via the KT-LCD3 display, users can optimize performance for various terrains. Adjusting power levels ensures efficient battery use, while assist levels provide the right amount of support, enhancing comfort and control during rides. This feature is especially useful for adapting to changing conditions, ensuring a seamless and enjoyable journey.
8.2 Bluetooth Connectivity and Pairing
Bluetooth connectivity allows e-bike controllers to pair with compatible devices, enhancing ride management. By linking to a smartphone or display via apps like eBike Connect, riders can monitor performance, customize settings, and access navigation. Pairing ensures seamless communication, enabling real-time data tracking and personalized adjustments. This feature simplifies integration with modern cycling tech, offering a user-friendly experience and improved control over your e-bike’s functionality.
Safety Precautions and Best Practices
Always wear protective gear, ensure proper installation, and avoid water exposure. Regularly inspect electrical connections and follow manufacturer guidelines to maintain safety and optimal performance.
9.1 Ensuring Safe Operation
Always wear a helmet and ensure loose clothing is secured. Regularly inspect electrical connections and keep the controller dry to prevent damage. Avoid overclocking or modifying settings beyond recommended levels. Follow the user manual guidelines for operation and maintenance. Never ride in hazardous conditions or exceed legal speed limits. Ensure all safety features, like brakes, are functioning properly before each ride. This ensures a safe and reliable e-bike experience.
9.2 Regular Maintenance Checks
Regularly inspect electrical connections and clean them to ensure proper function. Check for wear and tear on wires and connectors. Verify the controller is dry and free from dust. Inspect the throttle, brakes, and sensors for optimal performance. Refer to the user manual for specific maintenance schedules and guidelines. Perform these checks before long rides to ensure reliability and safety, and test the system after maintenance to confirm everything works correctly.

Upgrading or Replacing the Controller
Upgrading or replacing your e-bike controller ensures compatibility with your motor and battery. Follow the user manual for compatibility and installation steps to maintain optimal performance.
10.1 When to Upgrade Your Controller
Upgrade your e-bike controller if it’s underpowered, incompatible with your motor or battery, or causing performance issues. Consider upgrading if you need advanced features like Bluetooth connectivity or improved assist levels. Additionally, if your current controller is outdated, damaged, or no longer supports your riding needs, it’s time to replace it. Always ensure the new controller matches your system’s voltage and power specifications for optimal performance and safety.
10.2 How to Replace the Controller
To replace your e-bike controller, start by disconnecting the battery and all wires from the old unit. Remove the old controller and install the new one in its place. Reconnect the wires, ensuring correct connections for the motor, throttle, brakes, and sensors. Finally, reconnect the battery and test the bike to ensure everything functions properly. Always refer to the manual for specific instructions and safety precautions during the replacement process.

Resources and Support
Find comprehensive user manuals, manufacturer support, and help centers online. These resources provide detailed guides, troubleshooting tips, and software updates for optimal e-bike controller management and customization.
11.1 Finding User Manuals and Guides
User manuals and guides for e-bike controllers are readily available online. Manufacturers provide detailed PDF manuals on their websites, covering installation, parameter settings, and troubleshooting. Help centers and forums also offer valuable resources. For specific models like the KT-LCD3, manuals can be downloaded directly from the manufacturer’s site. These guides are essential for understanding controller functionality, ensuring safe operation, and optimizing performance. Always refer to official sources for accurate information.
11.2 Manufacturer Support and Help Centers
Manufacturers offer dedicated support through help centers, providing comprehensive resources for e-bike controllers. These include FAQs, troubleshooting guides, and video tutorials. Many brands, like Bosch and Giant, provide detailed manuals and direct support via phone, email, or live chat. Users can also access forums and community support for shared experiences and solutions. Manufacturer websites often feature extensive support sections, ensuring riders can resolve issues and optimize their controller settings effectively.
12.1 Summary of Key Points
The e-bike controller is a critical component, acting as the brain that manages power flow and integrates electrical components. Proper installation, configuration, and maintenance are essential for optimal performance and safety. Referencing the user manual ensures correct settings and troubleshooting. Regular maintenance, such as cleaning contacts and updating software, extends longevity. Understanding the controller’s role enhances riding efficiency and overall satisfaction, making it a vital aspect of e-bike ownership and operation.
12.2 Final Tips for E-Bike Controller Management
Always refer to your e-bike controller manual for specific instructions. Regularly inspect and clean electrical connections to prevent issues. Ensure proper battery maintenance and storage. Keep the controller dry and protected from extreme temperatures. Update software periodically for optimal performance. Follow manufacturer guidelines for power adjustments and assist levels. Store your e-bike in a secure, climate-controlled environment when not in use. Monitor battery levels and avoid deep discharges for longevity.