
Installation Instructions
Install your Skylink garage door opener by following these steps:
- Unpack and organize all components from the box.
- Place the opener on a flat surface near the garage door.
- Align the opener with the door’s center and secure it firmly.
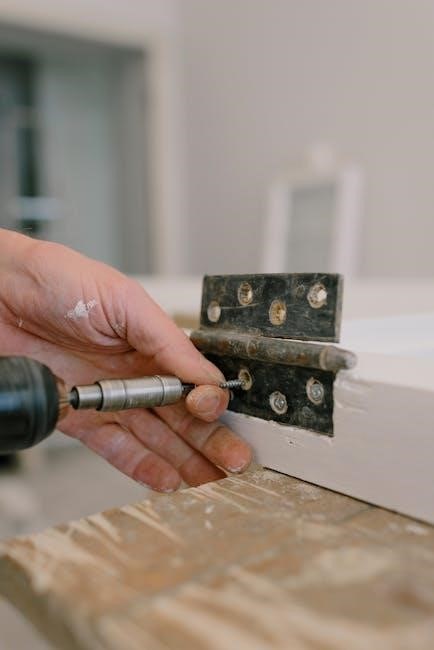
- Connect the wiring according to the manual’s diagram.
- Test the opener to ensure smooth operation.
- Refer to the manual for detailed instructions and safety precautions.
Always follow the manufacturer’s guidelines for proper installation.
1.1 Step-by-Step Installation Guide
Installing your Skylink garage door opener requires careful planning and adherence to the manufacturer’s instructions. Below is a detailed, step-by-step guide to ensure a smooth installation process:
- Prepare the Tools and Components: Gather all tools and parts included in the Skylink garage door opener kit. This typically includes the opener unit, mounting hardware, remote controls, and sensors.
- Mount the Opener: Locate the center of your garage door and mark the spot for the opener’s installation. Use a level to ensure proper alignment and secure the mounting bracket firmly to the door or wall.
- Connect the Wiring: Follow the manual’s wiring diagram to connect the opener to the power source and sensors. Ensure all connections are tight and insulated for safety.
- Install Safety Sensors: Place the infrared sensors on both sides of the garage door, about 6 inches above the floor. Align them properly to ensure they detect obstacles accurately.
- Program the Remote Controls: Sync the remote controls with the opener by pressing the programming button on the opener and following the sequence outlined in the manual.
- Test the Opener: Conduct a full test of the opener to ensure it operates smoothly. Check the door’s reversal feature by placing a small object under the door and observing its response.

Refer to your Skylink garage door opener manual for specific instructions tailored to your model. If you encounter any issues, consult the troubleshooting section or contact customer support for assistance.

1.2 Preparing the Garage Door for Installation
Before installing your Skylink garage door opener, it’s essential to ensure your garage door is properly prepared to accommodate the new opener. This preparation ensures smooth operation and prevents potential issues. Here’s how to prepare your garage door:
- Check Door Balance: A balanced garage door is crucial for the opener to function correctly. Test the door by manually lifting it; it should stay in place when partially open. If it’s unbalanced, adjust the springs or consult a professional.
- Inspect Alignment: Ensure the door is aligned properly with the frame. Misalignment can cause uneven wear on the opener and affect performance.
- Clean the Door and Frame: Remove dirt, grease, and debris from the door tracks and frame to ensure smooth movement and proper sensor alignment.
- Reinforce the Door (if needed): Some garage doors may require additional reinforcement to support the opener. Check the manual to see if your door needs extra bracing.
- Check Springs and Cables: Inspect the springs and cables for wear or damage. Replace any worn components before installing the opener to ensure safe operation.
- Clear Obstructions: Remove any objects or obstacles that could interfere with the door’s path or the opener’s sensors.
- Mark the Door’s Center: Locate the center of the garage door and mark it clearly. This will help with aligning the opener correctly during installation.
By following these steps, you’ll ensure your garage door is ready for the Skylink opener installation, leading to a safe and efficient setup.
1.3 Types of Door Controls and Their Setup
The Skylink garage door opener offers three distinct types of door controls, each designed to provide convenience and ease of use. Understanding each control type and its setup process ensures you can choose the one that best suits your needs.
- Push Button: The simplest control option, the push button is typically mounted on the wall near the garage door. It requires basic wiring and is easy to install. Follow these steps:
- Mount the push button at a convenient height.
- Connect the wires to the opener’s control panel.
- Test the button to ensure it operates the door smoothly.
- Deluxe Wall Console: This control offers additional features like a light button and a lock button to prevent unauthorized access. Setup involves:
- Mounting the console on the wall.
- Connecting the wires to the opener.
- Programming the lock feature if desired.
- LCD Wall Console: The LCD wall console provides a modern interface with a digital display. It allows for advanced settings and programmable functions. To set it up:
- Mount the console securely.
- Connect the wires to the opener.
- Follow the on-screen instructions to program settings.
Each control type is designed to integrate seamlessly with the Skylink opener, offering reliable performance and enhanced functionality. Refer to the manual for specific details on wiring and programming to ensure proper setup.
Safety Features and Precautions
The Skylink garage door opener includes essential safety features to ensure secure operation. The infrared sensor must be properly aligned to detect obstacles. Conduct monthly safety tests by placing a small object under the door to verify it reverses correctly. Always follow the manual’s guidelines for installation and maintenance to prevent accidents. Proper setup ensures reliable and safe functionality.
2.1 Infrared Sensor Alignment and Safety Tests
The infrared sensor is a critical safety feature of the Skylink garage door opener, designed to detect obstacles and prevent accidents. Proper alignment and regular testing are essential to ensure reliable operation. Begin by installing the sensor according to the manual’s instructions, typically 4-6 inches above the garage floor on both sides of the door. Ensure the sensors are level and aligned directly across from each other.

To test the sensors, place a small object (like a 1-inch block or a 2×4 laid flat) on the floor where the door would close. Activate the opener and observe if the door reverses upon contact. If it does not reverse, adjust the sensor alignment or sensitivity as needed. Repeat this test monthly to maintain safety standards.
Additionally, periodic checks of the opener’s safety features are required. Refer to the manual for specific instructions on adjusting the infrared sensor alignment. If the door does not respond correctly during tests, consult the troubleshooting section of the manual or contact customer support. Proper sensor alignment and regular safety tests ensure the garage door opener operates safely and efficiently, adhering to UL325 Safety Requirements.